Camera Settings
Cinematic Indoor Portraits: Tips on Using Available Lights
Hi everyone, today I am going to provide some tips on shooting indoor portraits. I will use one of my previous photoshoot in an indoor setting and using available lights.
Key Points
- Using a mirror
- Black Mist Filter
- Cinematic Lighting Directions
- ISO and Shutter Speed Settings
Using a mirror
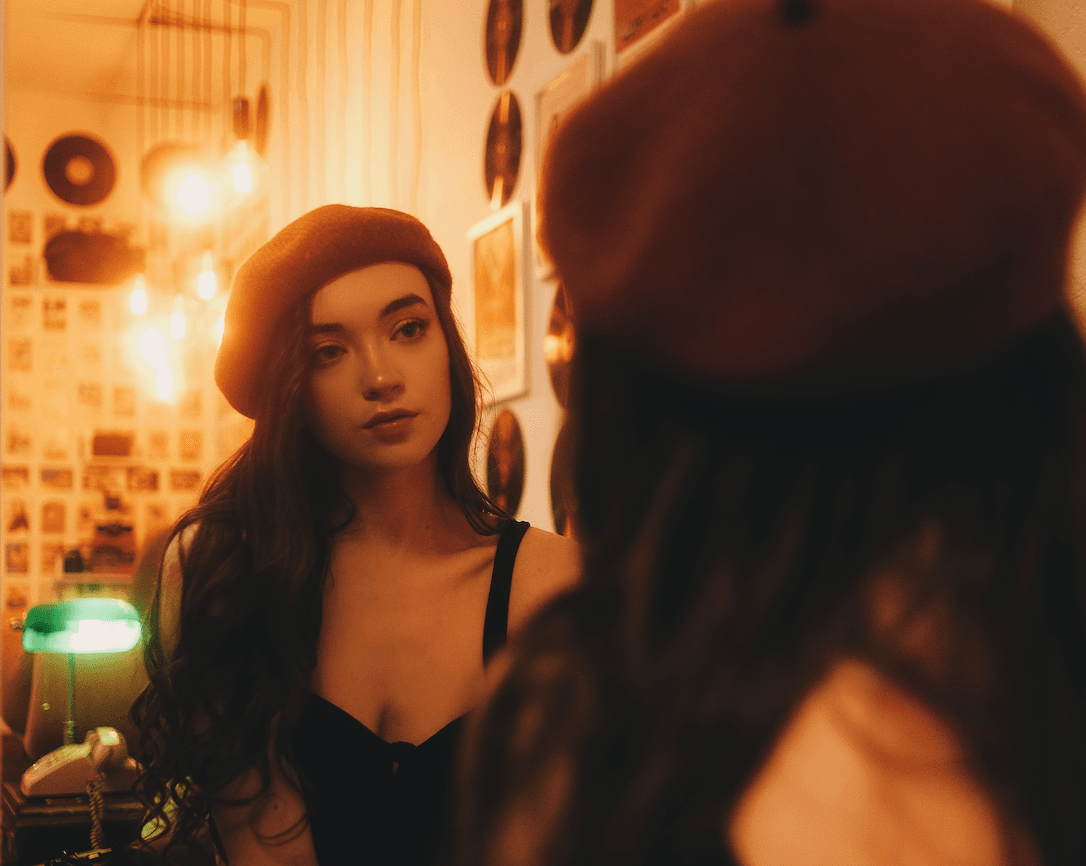
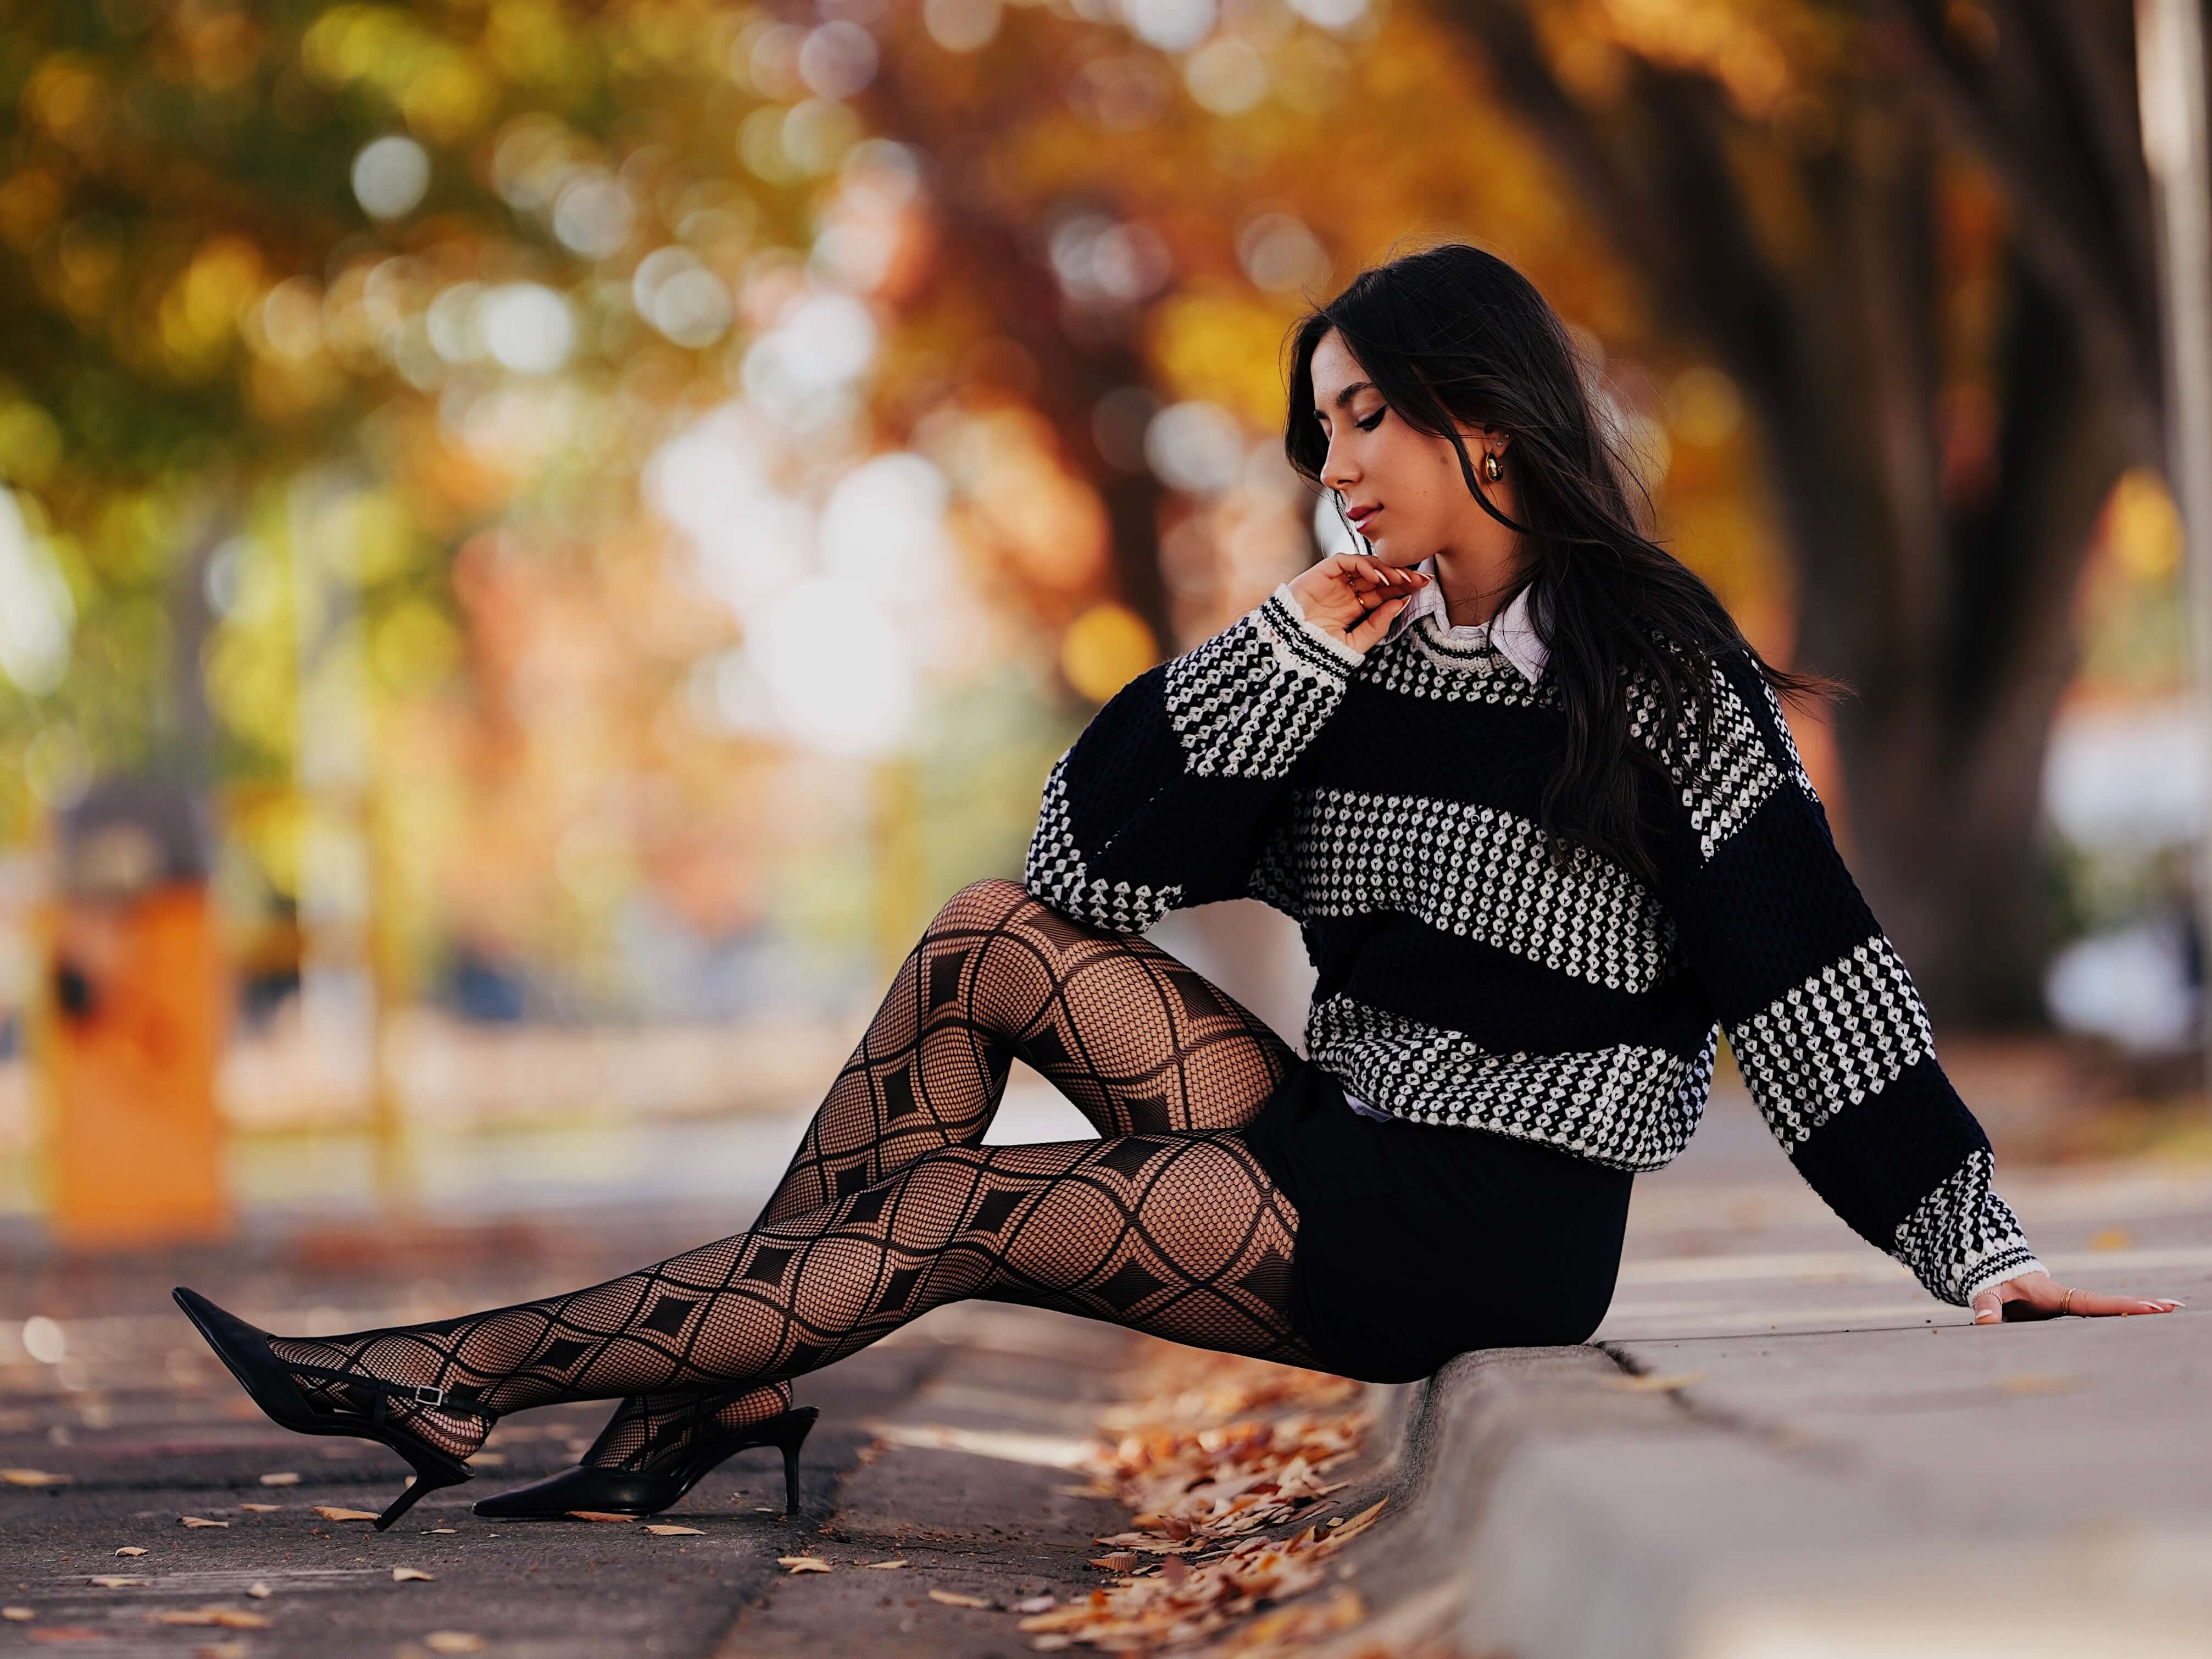
Most of the indoor location likely has some kind of mirrors. Mirror can help create a contextual foreground if you shoot over the model's shoulder. As you can see in the shot below, the foreground is the back of the model giving the context of the model's outfits from the back perspective.
This means that in one image, you can establish three layers of context in your image, the foreground, center (the model in focus) and the background (the environment/room atmosphere).
ISO 500, 1/125s, 23mm F1.4 | Model: kristenjcounts
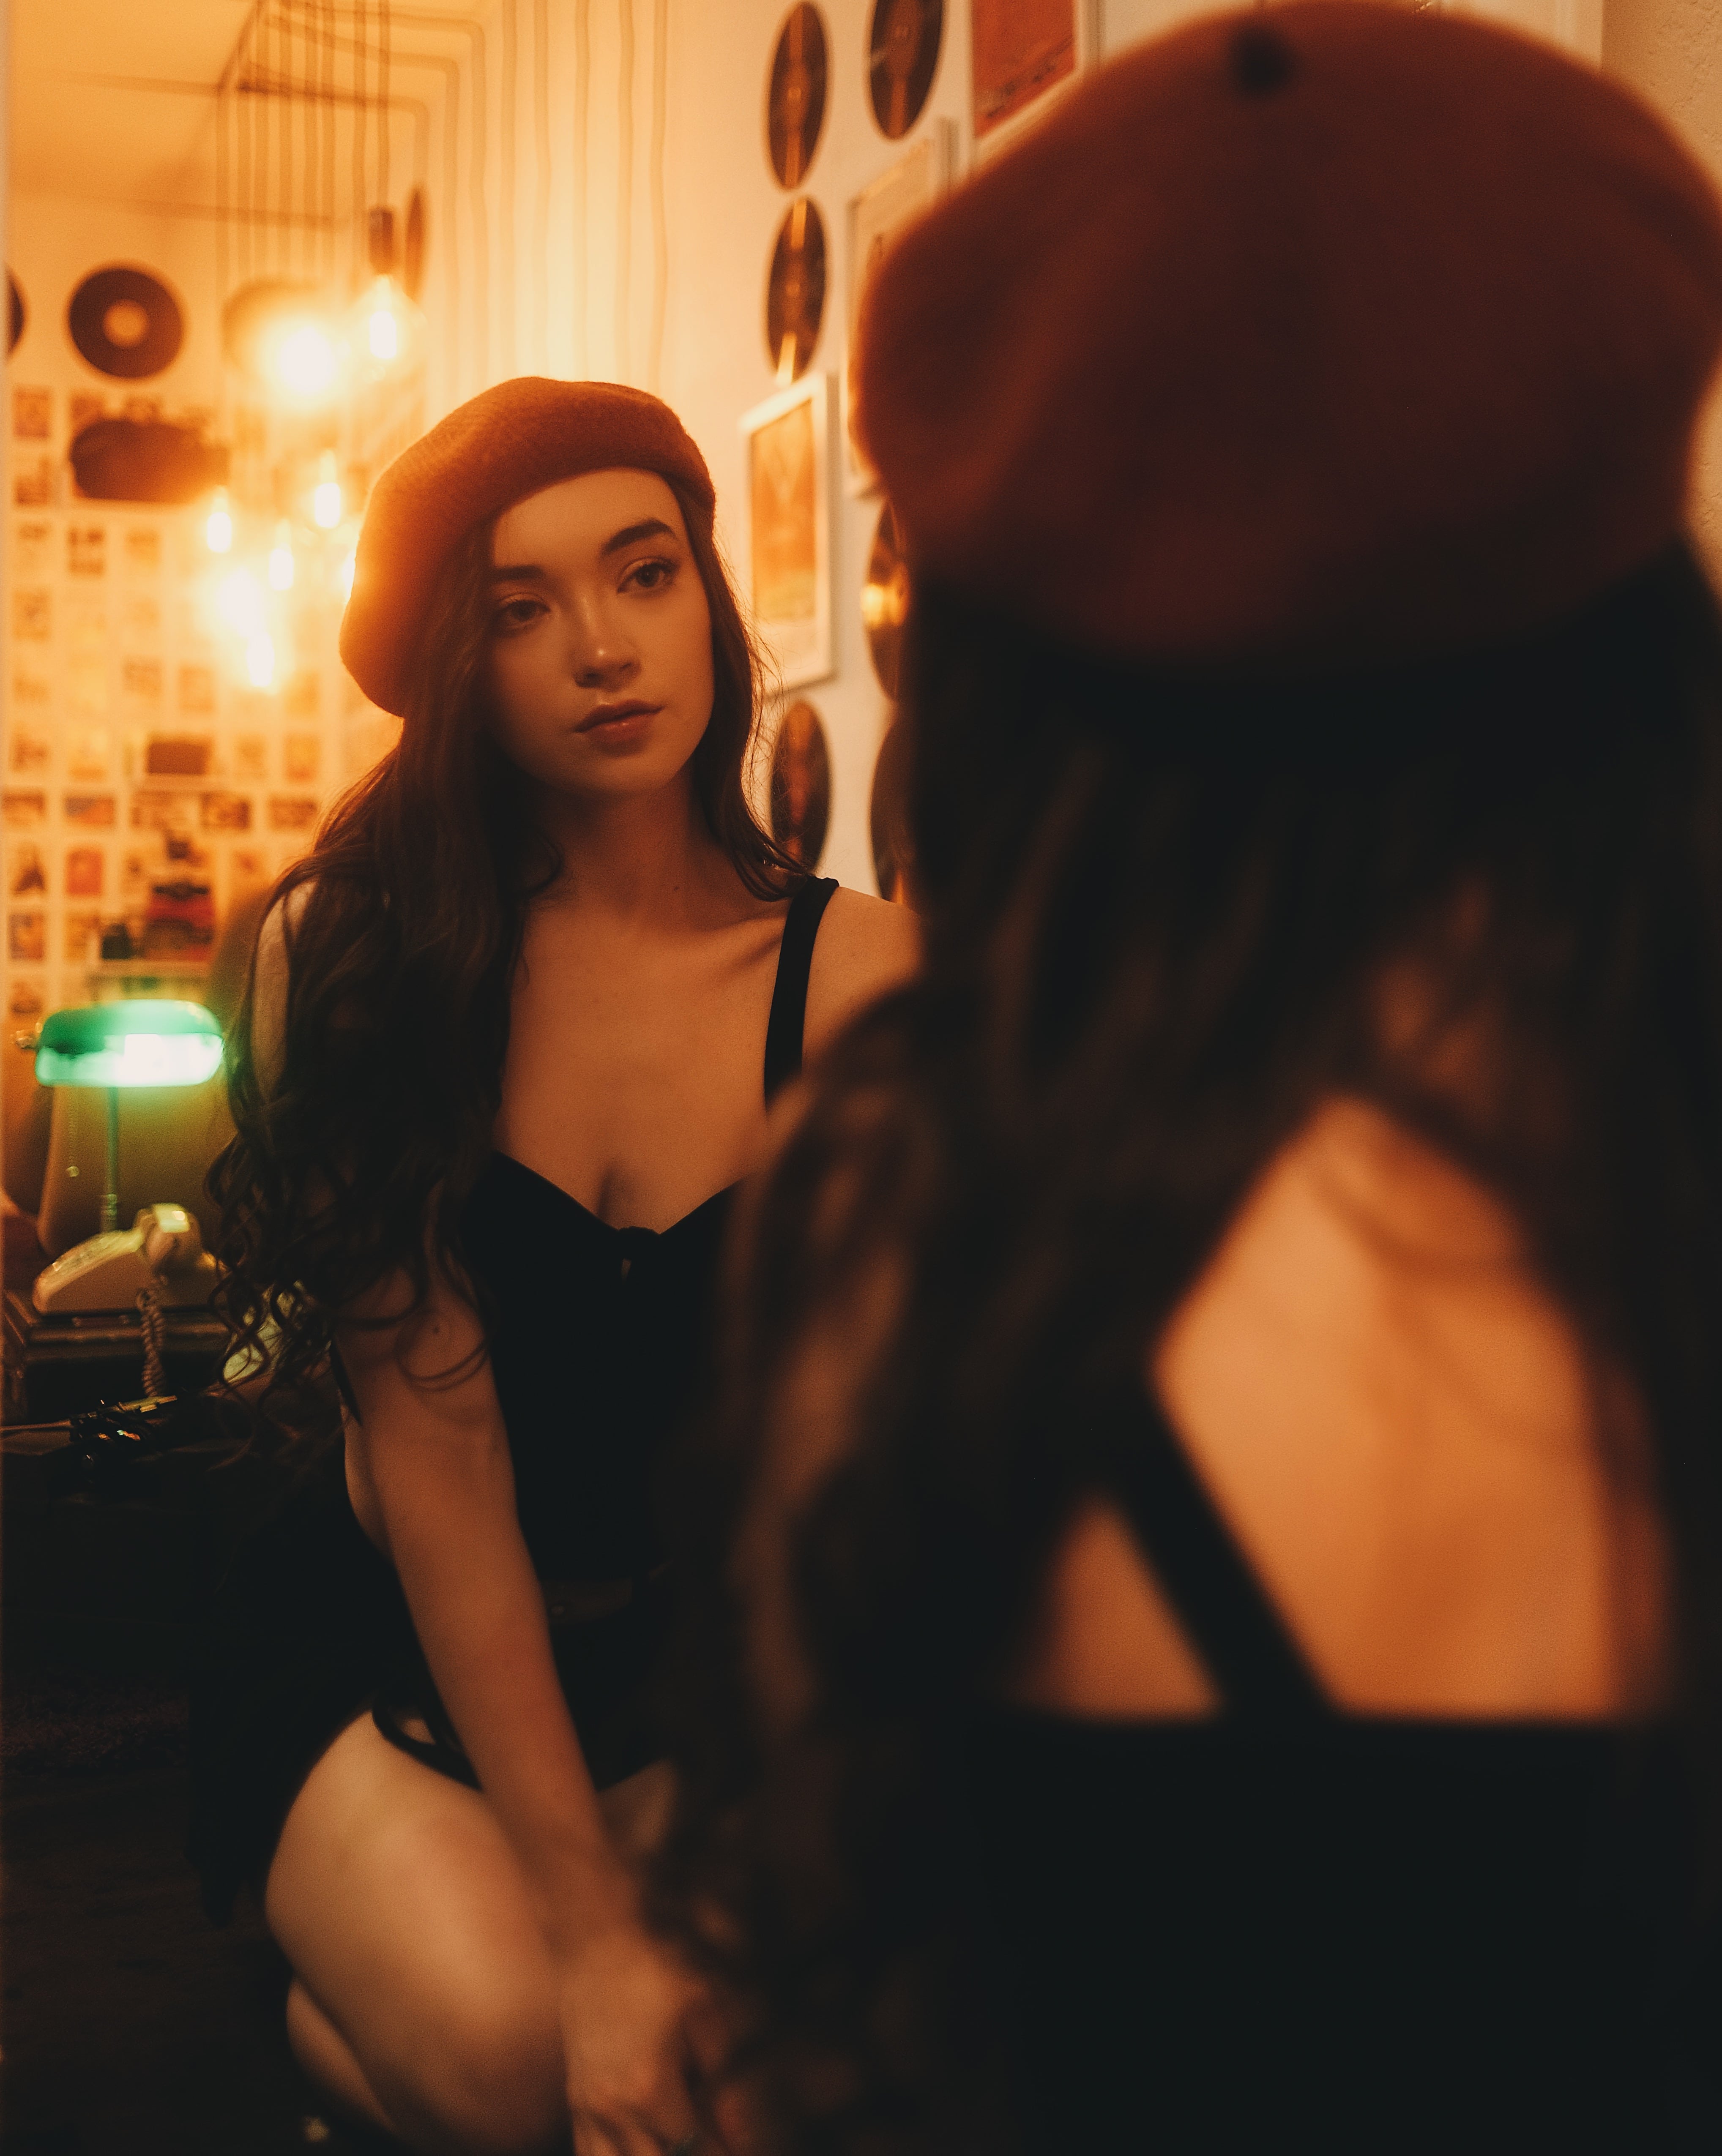
Using a black mist filter
Speaking of atmosphere, using a black mist filter will help create the mood. For this photoshoot, I am using a 1/4 stop black mist on the Fujifilm 23mm F1.4 lens.

ISO 320, 1/125s, 23mm F1.4 | Model: kristenjcounts
After putting the black mist filter, you will notice the glow on the available light sources. This creates a vintage look for the overall image and an atmosphere for the mood. If 1/4 stop is too much for your taste, you can use a 1/8 stop black mist to have a subtle glow effect and not overwhelm the whole image.

ISO 160, 1/170s, 23mm F1.4 | Model: kristenjcounts
Cinematic Lighting Directions
Recently, I have been researching on how the movie cinematic footages are usually shoot. I found out from the research that most movie scenes have the following elements in common:
- Far side key: refers to key lighting the side of the model's face that is away from the camera. The camera points toward the shadow side of the character's face. This creates more contrast and depth of the image.
- Background practice light: next time when you watch a movie, pay attention to the indoor scene background, there will mostly likely be a lamp for some background lighting. The background practical light also helps create the separation for your portraits, creating a sense of depth in the scene (instead of everything's dark in the back).
Below is an example of the far side key lighting, you can see the main light source is coming from the other side of her face. And the Fujifilm camera is pointing to the darker side of her face.
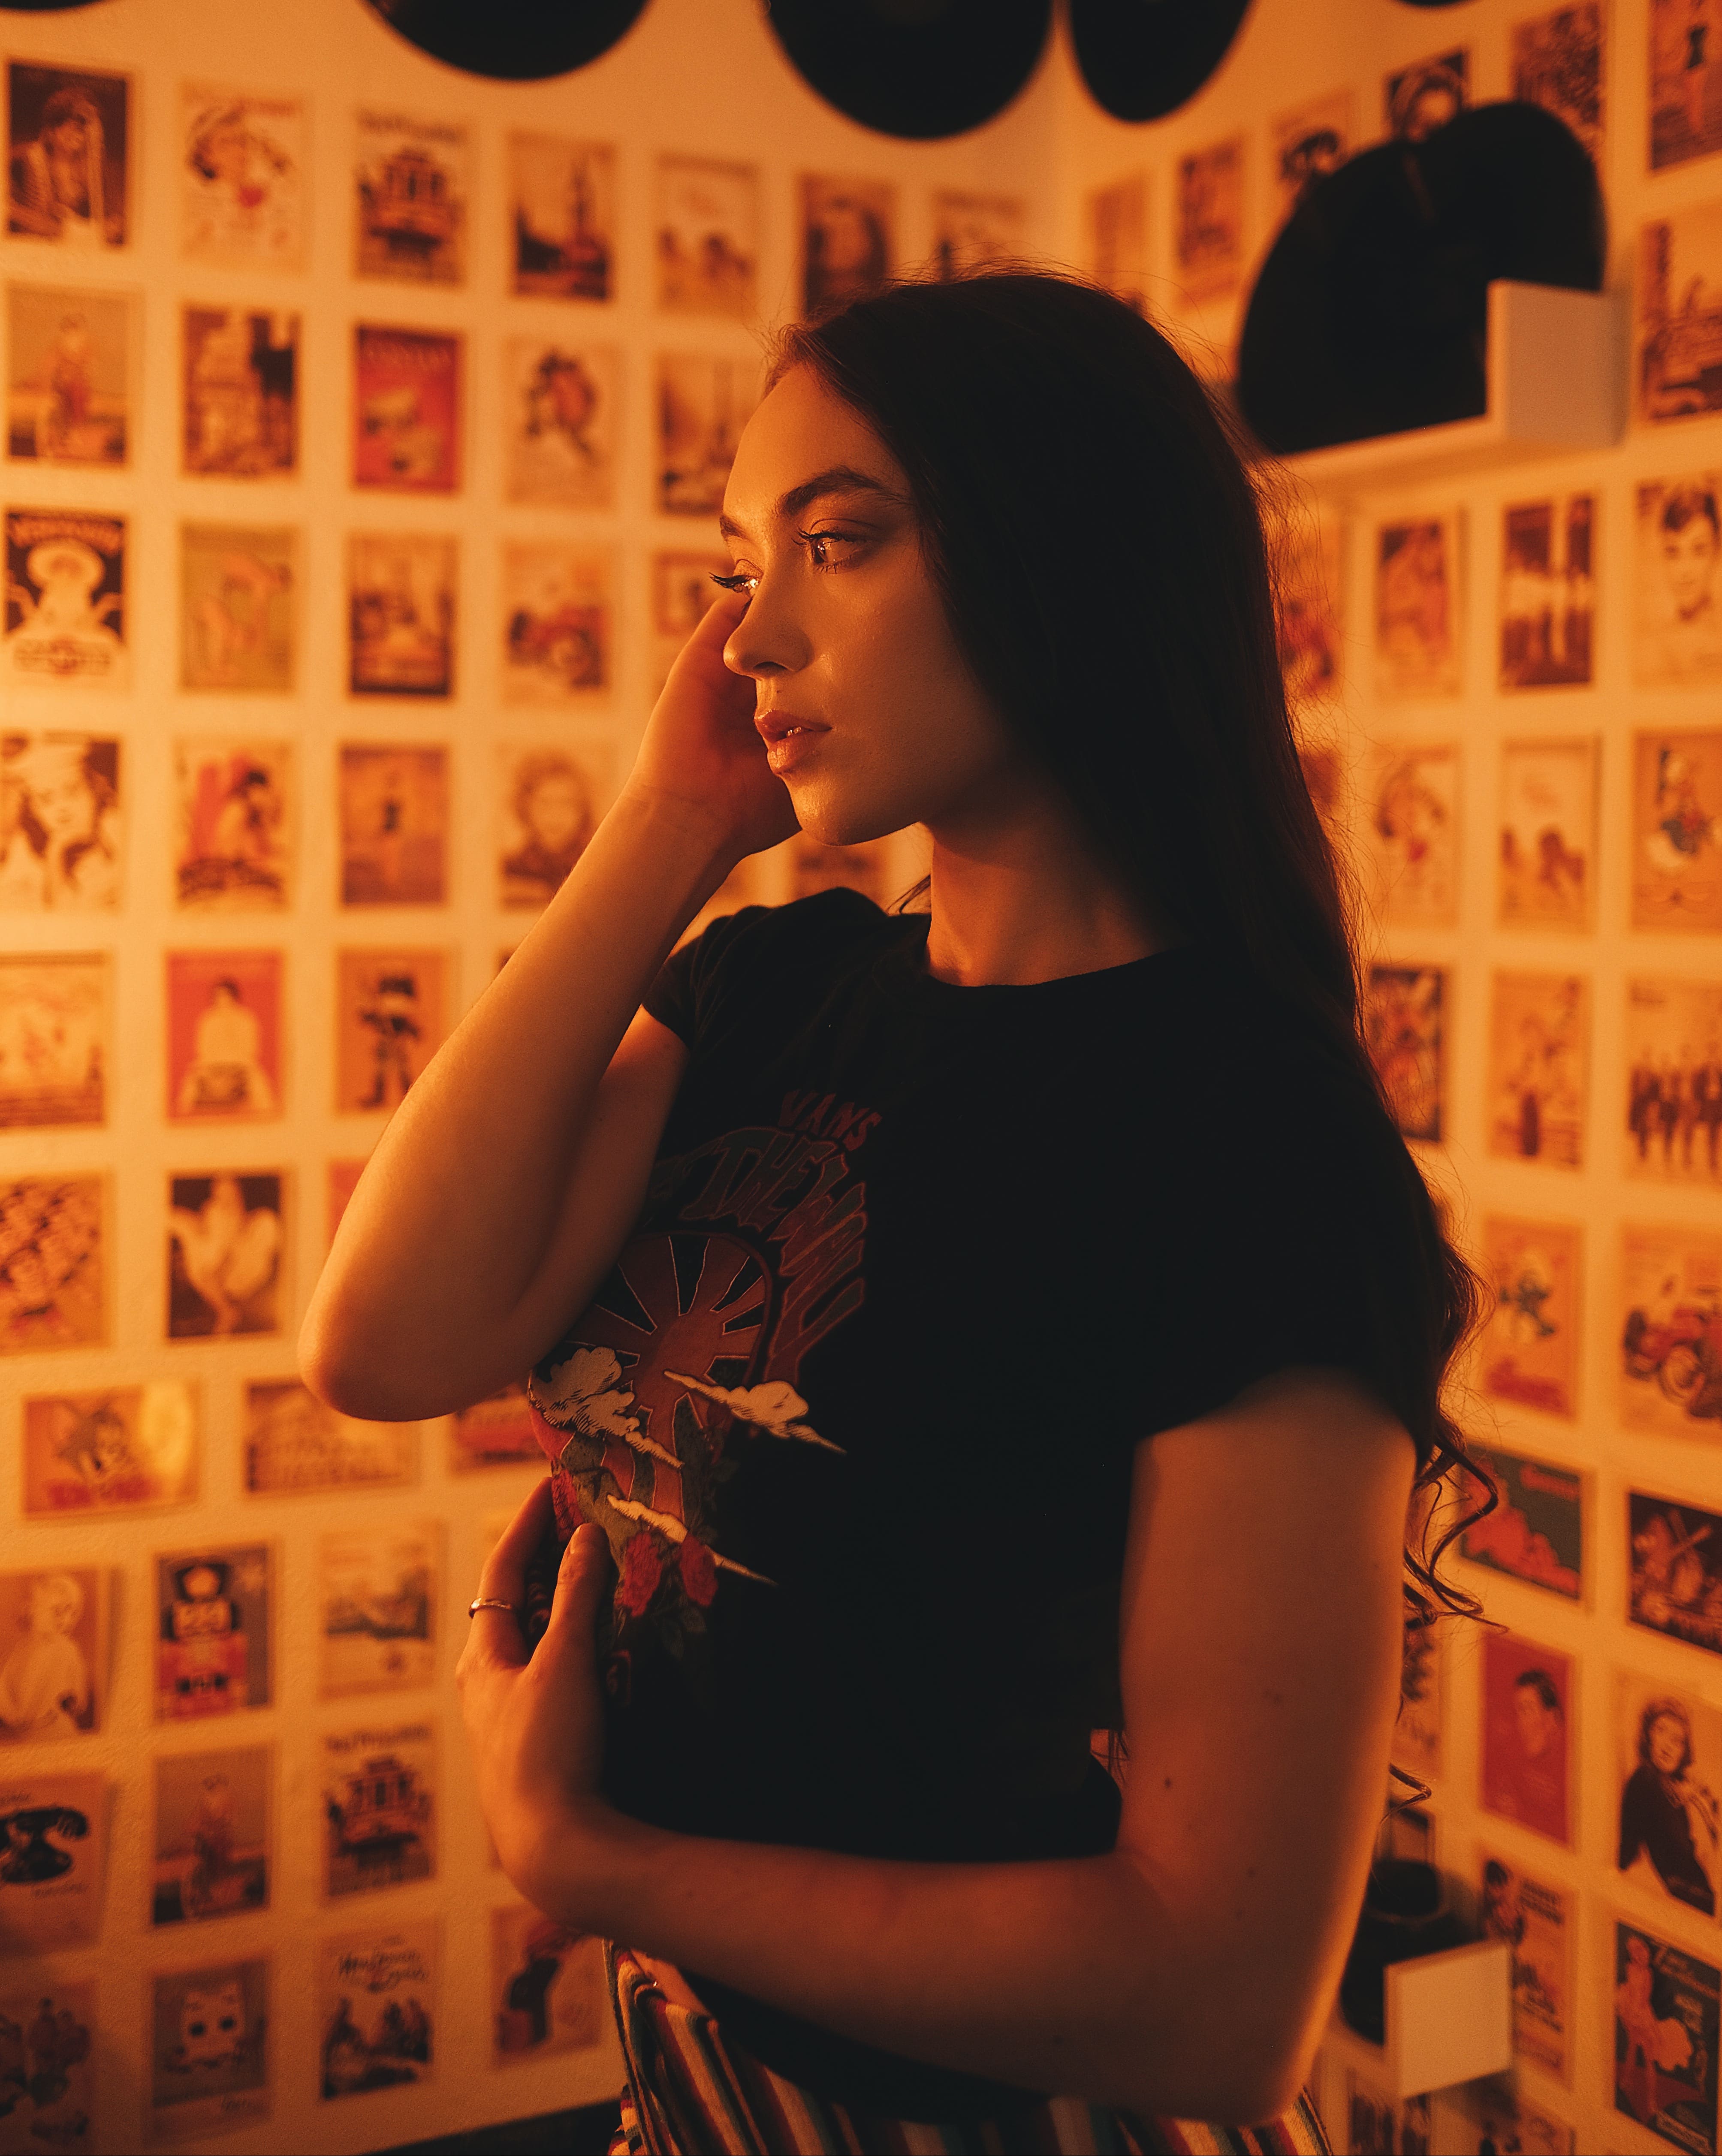
Far side key | ISO 320, 1/125s, 23mm F1.4 | Model: kristenjcounts
Below is an example of a lamp light in the background wall. The light in the background wall helps to create a sense of distance for the image.
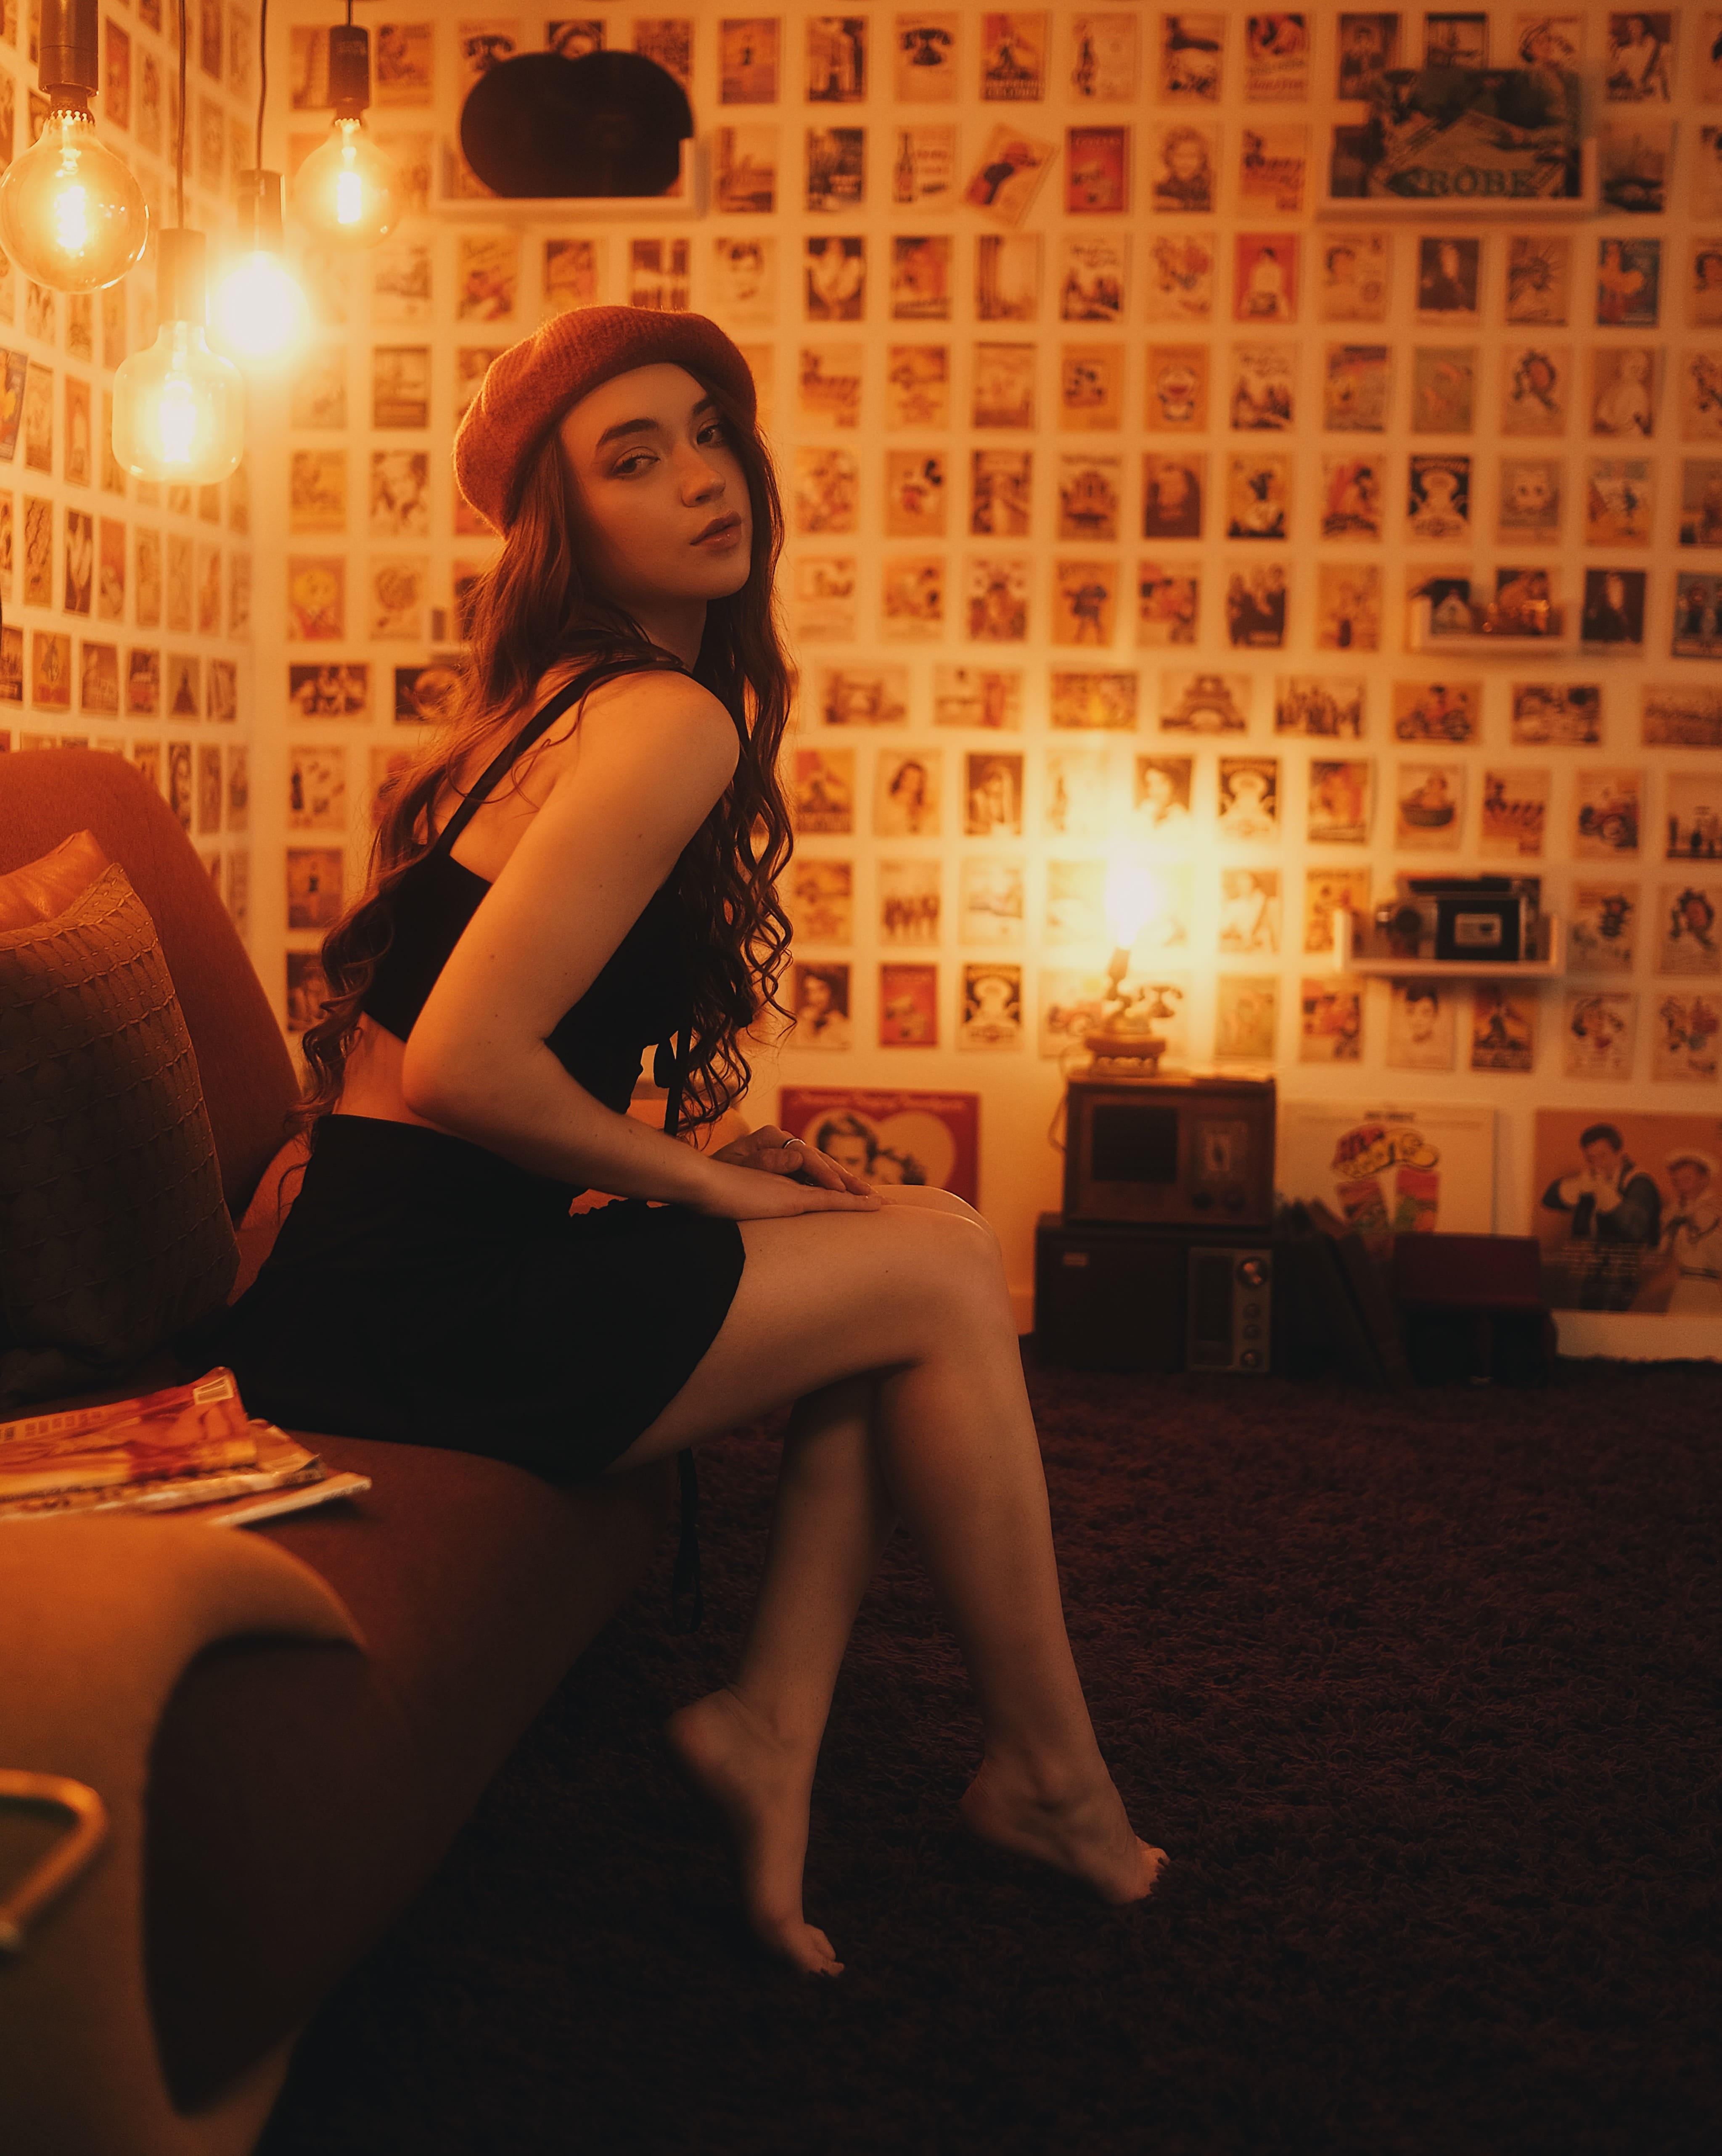
Background Lamp | ISO 320, 1/125s, 23mm F1.4 | Model: kristenjcounts
ISO and Shutter Speed Settings
For ISO, you notice the images in this blog post are not in very high ISO since the light source are pretty close to the subject. Nowadays, most modern mirrorless camera can handle more low light setting. I will consider 6400 as the limit for the low light image. Even there is some grain, because we are shooting a vintage vibe, grain sometimes will improve the retro feeling of the image.
For Shutter speed, I will set it minimum at 1/125s. If you have a tripod for stabilization, you can set the speed slower.
In summary, today I provided some tips for my indoor cinematic portraits and what my ISO and shutter speed settings.
Thanks for reading :) More photos will be uploaded in my Instagram account: @caliallstaring.
Related Posts
Camera Settings
Portrait Photography: Essential Poses and Compositions for Stunning Shots
Welcome to my blog post on portrait photography! Whether you're a seasoned photographer or just starting out, understanding different poses and compositions is key.
Camera Settings
Which Stops of Black Pro Mist Filter Should You Use for Your Lenses Portraits? K&F Concept
Today I am going to talk about my experience on using K&F Concept Black Diffusion filters on different lenses with various focal length, and what is the best stop for the particular focal length's por…

Camera Settings
How to Edit and Export HD Footage of a Vertical Instagram Reel Video Through Final Cut Pro X
In the ever-evolving world of social media, creating eye-catching and high-quality content is essential to capture your audience's attention.